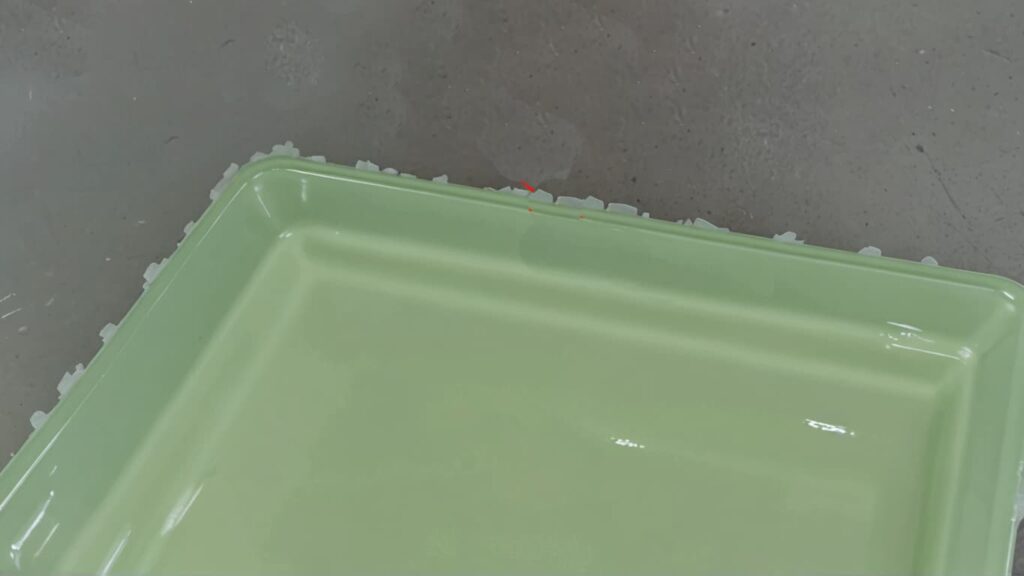
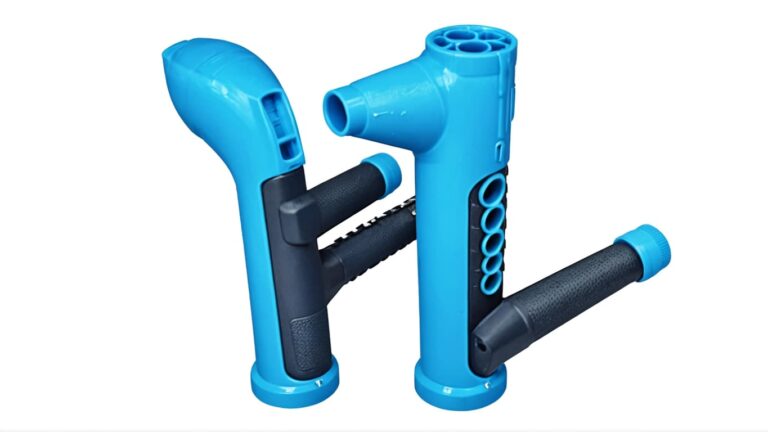
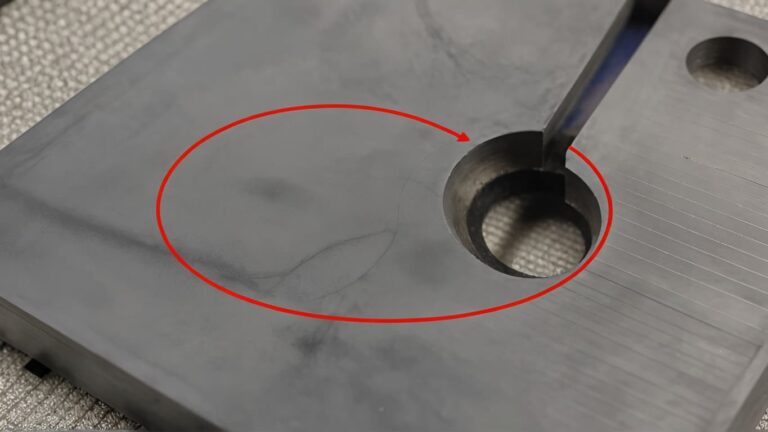
Injection molding flash refers to the excess material that escapes from the mold cavity and solidifies on the edges of a molded part. This unwanted material is typically thin and appears along the parting line, ejector pins, or other mold interfaces. Flash can impair product aesthetics and functionality, especially in precision components.
The occurrence of flash is primarily due to imperfect mold sealing, excessive injection pressure, or wear and tear in mold components. During the injection process, molten plastic is forced into the cavity. If any gaps exist between mold segments, the material seeps through and forms flash.
Addressing flash is critical in manufacturing. According to a report by Plastics Technology, up to 15% of total part rejections in high-volume production are due to flash-related defects. Unchecked flash can lead to downstream issues such as poor fit in assemblies, increased finishing labor, and higher production costs.
Several factors can lead to flash in injection molding:
- Mold Design and Parting Line Quality: A poorly machined or worn mold parting surface can fail to seal properly, allowing material to escape. Uneven or large parting surfaces reduce the effectiveness of mold clamping.
- Insufficient Clamping Force: If the clamping force is too low relative to the injection pressure, the mold may open slightly during filling. Flash tends to occur more frequently in areas farthest from the clamping center.
- Material Characteristics: Low-viscosity resins are more prone to flash due to their high flowability. Additionally, additives or fillers can alter flow behavior, increasing the likelihood of flash formation.
Laser treatment of the parting surface edge is an effective solution to enhance its hardness and sealing capability. This method improves the mold’s durability and reduces the chance of material leakage. Another recommended approach is reducing the parting surface area. According to mold design principles, a smaller area increases localized pressure at the mold interface, which helps in preventing flash.
To identify flash, manufacturers should:
- Inspect Parting Lines and Mold Interface: Regular visual inspections and dimensional checks can help detect early wear or damage that leads to flash.
- Use High-Speed Cameras and Mold Sensors: These tools can reveal mold deflection or improper seating during the injection cycle.
- Perform Material and Process Analysis: Analyzing resin flow characteristics and adjusting parameters such as injection speed, holding pressure, and temperature can help fine-tune the process.
However, caution is needed when modifying injection parameters. For instance, reducing packing pressure or cooling time to minimize flash might increase the risk of sink marks or incomplete filling. For minor flash occurrences, especially in low-volume production, manual removal may be a more cost-effective solution than extensive mold modification. In fact, industry surveys show that over 60% of small-scale manufacturers choose manual trimming when flash is within tolerable limits.
To minimize the risk of injection molding flash, manufacturers should implement a combination of design, processing, and maintenance strategies:
- Laser treatment of the parting surface edge: This process enhances surface hardness and reduces wear, which is a major contributor to flash. According to a 2021 study in Journal of Manufacturing Processes, laser-hardened mold surfaces showed a 30% reduction in flash defects over 100,000 cycles.
- Reducing parting surface area: A smaller parting surface increases closing pressure per unit area, effectively sealing the mold. Under the same clamping force, raising localized pressure at the mold interface helps prevent material leakage.
- Optimizing clamping pressure: Insufficient clamping pressure is a common cause of flash. However, over-tightening can damage molds and increase cycle time. Experts recommend using pressure sensors and real-time monitoring systems to maintain optimal levels.
Though adjusting injection parameters like injection speed and holding pressure can reduce flash, this often leads to other quality issues such as increased sink marks or longer cycle times. Therefore, for minor flash issues, I recommend manual trimming as a cost-effective and efficient solution.
Routine maintenance of molding equipment is essential to prevent flash and prolong machine life:
- Regular maintenance practices: Include cleaning vents, checking ejector pins, and inspecting seals. A report by Plastics Technology (2020) emphasized that shops with proactive maintenance schedules saw a 40% reduction in flash-related defects.
- Impact of equipment condition: Worn-out components such as damaged mold surfaces or misaligned platens can create gaps that lead to flash. Ensuring tight tolerances in machine setup is critical.
- Calibration and routine checks: Regular calibration of injection units and clamping systems ensures consistent performance. Using digital maintenance logs and predictive diagnostics tools can help identify issues early.
Integrating manufacturability principles early in the design phase can significantly reduce the risk of flash:
- Design principles to prevent flash: Use uniform wall thickness, avoid sharp corners near the parting line, and maintain consistent draft angles. These reduce stress concentrations that may cause mold deflection.
- Mold and part guidelines: Ensure proper venting and gate location, and design parting lines to minimize interruption of flow. According to a study in Injection Molding Handbook, optimized gate placement can reduce flash occurrence by up to 25%.
- Benefits of early manufacturability integration: Involving tooling and process engineers during the design stage leads to fewer revisions, faster time-to-market, and lower long-term production costs.
By applying these strategies and maintaining a holistic approach, manufacturers can effectively prevent flash, enhance product quality, and reduce operational costs.
Injection molding flash is excess material that leaks out of the mold cavity and solidifies along the parting lines or ejector pin areas. Common deflashing methods include:
- Manual trimming: Using knives, razors, or scissors. Low cost but labor-intensive. Suitable for low-volume production or simple parts.
- Cryogenic deflashing: Involves freezing the parts and blasting them with media. Effective for rubber and thermoplastics.
- Vibratory tumbling and sanding: Used for small and delicate parts. Offers uniform results but may not reach tight areas.
- Laser deflashing: Highly precise and contactless. Ideal for complex geometries but has high initial investment.
Manual deflashing is often preferred for minor flash issues or prototypes due to its flexibility. In my experience, if the amount of flash is minimal, manual removal is still the most cost-effective and practical solution. However, for high-volume production, automated methods ensure consistency and efficiency.
Choosing the correct deflashing technique depends on several factors:
| Criteria | Manual Method | Automated Method |
|---|---|---|
| Cost | Low | High |
| Precision | Moderate | High |
| Volume Suitability | Low-volume | High-volume |
| Part Complexity | Limited | Complex geometry |
To prevent flash and ensure part quality, manufacturers must adopt robust quality control practices. These include:
- Regular mold maintenance: Worn or damaged mold surfaces often lead to flash. Scheduled inspections can detect early signs of wear.
- Monitoring processing parameters: Temperature, injection pressure, and clamping force need to be tightly controlled. According to a 2021 study by the Journal of Polymer Engineering, fluctuations in injection pressure account for over 30% of flash defects reported.
- In-line visual inspections: Using cameras or sensors to detect flash during production allows for immediate corrective action.
It’s important to note that while adjusting parameters like hold pressure or injection speed can reduce flash, it may lead to other defects such as sink marks. Therefore, maintaining balance is critical.
Strategies for consistent quality include:
- Using Statistical Process Control (SPC) to monitor deviations.
- Training operators to recognize early signs of flash.
- Implementing ISO 9001-compliant quality systems for traceability and documentation.
Outsourcing to a trusted injection molding partner can significantly reduce the risk and cost associated with flash defects. Here are key tips:
- Look for experience and specialization: Choose providers with a proven track record in your industry. For example, companies experienced in medical or automotive molding are more likely to meet tight tolerance requirements.
- Evaluate technical capabilities: Ensure the provider uses advanced techniques such as laser edge treatment to harden parting lines. This not only improves mold durability but also reduces flash.
- Assess quality assurance systems: A reliable partner should offer in-house quality checks, mold flow analysis, and post-processing services like deflashing and surface finishing.
When evaluating potential providers, ask for:
- Client testimonials or case studies.
- Certifications (e.g., ISO 13485 for medical devices).
- Facility tours or virtual demonstrations.
Ultimately, a capable injection molding partner not only delivers parts with minimal flash but also helps you improve mold design and optimize process parameters for long-term success.
Injection molding presents various defect types beyond flash. These include:
- Sink marks: Indentations on the surface due to uneven cooling or insufficient pressure.
- Short shots: Incomplete filling of the mold, often caused by inadequate injection speed or blocked vents.
- Weld lines: Visible lines where two melt fronts meet, typically due to low melt temperature or improper gate placement.
To prevent these issues:
- Use optimized cooling channels to ensure uniform cooling and reduce sink marks.
- Increase injection pressure or melt temperature to prevent short shots.
- Adjust gate locations and increase mold temperature to eliminate weld lines.
Troubleshooting involves:
- Regular mold maintenance to prevent vent clogging or part damage.
- Using simulation software like Moldflow to predict defect-prone areas.
- Monitoring key parameters (e.g., temperature, pressure, fill time) using sensors and process control systems.
Enhancing product quality requires consistent application of best practices:
- Material handling: Dry materials properly to avoid bubbles or degradation.
- Machine calibration: Regularly calibrate injection settings and ensure equipment precision.
- Mold design: Use proper draft angles, venting, and gate placement to optimize flow.
Implementing best practices leads to:
- Improved dimensional stability and surface finish.
- Reduced defect rates and lower scrap costs.
- More consistent cycle times and productivity.
Tips for continuous improvement:
- Apply Six Sigma or Lean Manufacturing methodologies.
- Conduct regular process audits.
- Use feedback loops from quality control to refine molding parameters.
Educating staff on injection molding techniques is critical. According to a 2021 study by Plastics Technology, facilities with structured training programs reported 35% fewer molding defects.
Effective training programs should cover:
- Material science basics.
- Machine operation and safety protocols.
- Hands-on troubleshooting exercises.
Fostering a quality-focused culture involves:
- Encouraging operators to report anomalies early.
- Recognizing and rewarding defect prevention efforts.
- Empowering technicians to make real-time process adjustments.
In my opinion, while parameter adjustments can help reduce flash and other defects, they may introduce new issues like sink marks. Therefore, beyond process tuning, structural solutions such as laser-treating the parting surface to enhance hardness or reducing the parting surface area should be considered first. In cases where flash persists but is minimal, manual trimming remains a practical and cost-effective solution.
- Injection molding flash refers to excess material that escapes from the mold cavity during the molding process. It typically occurs along the parting line or ejector pin areas. This defect not only affects product aesthetics but can also compromise part functionality and increase post-processing costs.
- Throughout the blog, we discussed various methods to prevent flash, including optimizing mold design, maintaining proper clamping force, and adjusting processing parameters. One notable approach is laser treatment of the parting surface edge, which improves hardness and reduces the likelihood of flash formation. A study by the Journal of Manufacturing Processes (2020) highlights that laser-hardened mold surfaces can reduce edge wear by up to 40%, thereby minimizing flash.
- Another promising technique is reducing the area of the parting surface. This increases localized clamping pressure, decreasing the chance of material leakage. However, while process parameter adjustments (e.g., injection speed and pressure) can mitigate flash, they might introduce other issues like sink marks, as noted in research by Plastics Technology.
- In cases where flash is minimal and consistent, manual trimming can be a cost-effective solution. According to industry data, manual flash removal is suitable for volumes under 1000 units/month, especially when mold redesign is not economically viable.
- Proactive defect prevention strategies are crucial. Manufacturers should prioritize mold maintenance, invest in surface treatments, and use predictive analytics to monitor process stability. Implementing these best practices ensures higher product consistency, reduces rework, and enhances customer satisfaction.
- Manufacturers are encouraged to audit their injection molding processes, train operators on defect identification, and incorporate continuous improvement frameworks like Six Sigma to sustain quality assurance.


